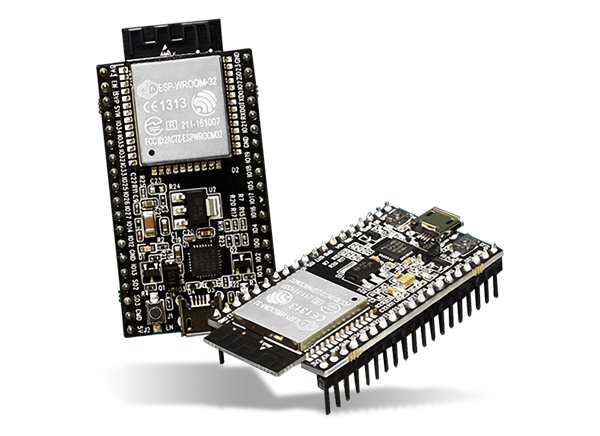
Have you ever found yourselves scratching your heads over perplexing connectivity issues? If you’re anything like us, you’ve probably encountered your fair share of head-scratching moments. In this short post, we would like to share one such experience we recently tackled while trying to connect our ESP32 devices to our office Wi-Fi Access Point (AP).

The challenge emerged when we needed to integrate ESP32 devices into our existing infrastructure, a set of x86_64 and aarch64 nodes, interconnected into a number of clusters where we experiment and deploy the systems software we build. The catch? The data room lacked Wi-Fi coverage, except for the AP of the upstream modems, leaving our IoT devices isolated from the clusters’ VLANs.
To address this, we had two options: either invest in a new AP, dedicated to the IoT devices in the data room or use one of the cluster nodes to act as an AP, bridging their ethernet connectivity with their Wi-Fi interfaces. Opting for the latter, we started working on setting up the AP on a RPi device.

By default, Raspbian uses Network Manager to handle all network connections. Using nmtui on stock Raspbian, we set up a bridge between eth0 and wlan0, configure the SSID, and set the WPA-PSK password for the AP. After playing around with nmtui, we figured that it might be easier to setup the AP using the command line tool, nmcli. A snippet like the following would do the trick:
1nmcli c add type wifi ifname wlan0 con-name WIFI_AP autoconnect yes ssid nbfc-iot
2nmcli con modify WIFI_AP 802-11-wireless.mode ap 802-11-wireless.band bg ipv4.method shared
3nmcli con modify WIFI_AP wifi-sec.key-mgmt wpa-psk
4nmcli con modify WIFI_AP wifi-sec.psk "PASSWORD"
5nmcli con up WIFI_AP
Initial tests with a mobile phone and a laptop connecting to the AP were successful, but when it came to connecting the ESP32 devices, we hit a roadblock.
Despite Wi-Fi scans showing the correct SSIDs, the ESP32 devices stubbornly refused to connect. We tried everything: from tinkering with frequency bands (5GHz/2.4GHz) to flashing one of the devices with micropython and experimenting with network and WLAN connectivity settings – all to no avail.
While debugging the issue, we listed available Wi-Fi networks from a neighboring RPi node, and from the ESP32 device that we flashed with micropython. The output from the RPi device and the ESP32 device is shown below:
1$ nmcli device wifi list
2BSSID              SSID       MODE   CHAN  RATE        SIGNAL  BARS  SECURITY
3D8:3A:DD:AF:D7:D3  nbfc-iot   Infra  3     65 Mbit/s   100     ▂▄▆█  WPA1
45C:64:8E:41:AB:32  NBFC-AP    Infra  100   270 Mbit/s  69      ▂▄▆_  WPA2
 1>>> import network
 2>>> sta_if = network.WLAN(network.STA_IF)
 3>>> sta_if.active(True)
 4True
 5>>>
 6>>> authmodes = ('Open', 'WEP', 'WPA-PSK', 'WPA/WPA2-PSK')
 7>>> for (ssid, bssid, channel, RSSI, authmode, hidden) in sta_if.scan():
 8...   print("* {:s}".format(ssid))
 9...   print("   - Auth: {}".format(authmodes[authmode]))
10...   print("   - Channel: {}".format(channel))
11...   print("   - RSSI: {}".format(RSSI))
12...   print("   - BSSID: {:02x}:{:02x}:{:02x}:{:02x}:{:02x}:{:02x}".format(*bssid))
13...   print()
14
15* nbfc-iot
16   - Auth:  WPA-PSK
17   - Channel: 3
18   - RSSI: -31
19   - BSSID: d8:3a:dd:af:d7:d3
20
21* NBFC-AP
22   - Auth:  WPA/WPA2-PSK
23   - Channel: 1
24   - RSSI: -69
25   - BSSID: 5c:64:8e:41:ab:32
By examining the output, we finally pinpointed the culprit: the ESP32 devices only support WPA2, whereas our RPi AP defaulted to plain WPA. The solution? Modify the Wi-Fi security protocol setting on the RPis to use WPA2. Finding a way to do this was much more complicated than it should. Luckily, we were able to find our way around nmcli and setup RSN (or WPA2) using the nmcli command:
1nmcli con modify WIFI_AP 802-11-wireless-security.proto rsn
Where WIFI_AP is the names of the connection. A command that proved particularly useful was the following:
 1$ nmcli con show WIFI_AP
 2[snipped]
 3802-11-wireless.ssid:                   nbfc-iot
 4802-11-wireless.mode:                   ap
 5802-11-wireless.band:                   bg
 6802-11-wireless.channel:                3
 7802-11-wireless.bssid:                  --
 8802-11-wireless.rate:                   0
 9802-11-wireless.tx-power:               0
10802-11-wireless.mac-address:            --
11802-11-wireless.cloned-mac-address:     --
12802-11-wireless.generate-mac-address-mask:--
13802-11-wireless.mac-address-blacklist:  --
14802-11-wireless.mac-address-randomization:default
15802-11-wireless.mtu:                    auto
16802-11-wireless.seen-bssids:            D8:3A:DD:AF:D7:D3
17802-11-wireless.hidden:                 no
18802-11-wireless.powersave:              0 (default)
19802-11-wireless.wake-on-wlan:           0x1 (default)
20802-11-wireless.ap-isolation:           -1 (default)
21802-11-wireless-security.key-mgmt:      wpa-psk
22802-11-wireless-security.wep-tx-keyidx: 0
23802-11-wireless-security.auth-alg:      --
giving us all the configuration parameters for nmcli and this particular connection.
With this seemingly small adjustment, the ESP32 devices connected to our office networks, and our cloud-native exploration for IoT devices could proceed without further hiccup.
Reflecting on this experience, we’re reminded of the importance of thorough testing and persistence when dealing with diverse hardware and complex network setups. Sometimes, the solution lies in seemingly small configuration tweaks that make all the difference.
We hope sharing this journey proves helpful to others facing similar challenges in their IoT projects. Happy hacking!